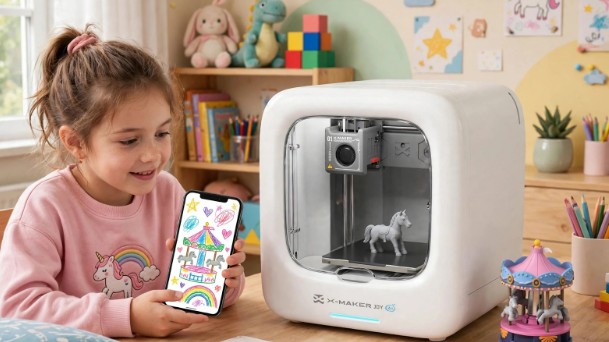
From Phone Sketch to Toy: How AI Design Apps Turn Kids Doodles Into 3D Prints
My daughter drew a wobbly cat on my phone. One ear sat higher than the other. She asked if it could become a real toy. That same evening, the cat was on her desk, printed in plastic and small enough to hold.
No complex design software stood in her way at the start. A shape she already knew how to draw was her starting point.
How a Sketch Becomes Something You Can Hold
The path is short. My son sketched a shape in the app. He adjusted it. Then he sent it to the printer. The printer built it layer by layer from PLA filament.
Keychains usually print in 15 to 30 minutes, according to AOSEED. That short wait means a first project feels finished, rather than endless.
Drawing First, Printing Second
The AOSEED app is built around that order. AOSEED calls it a creative playground. Kids sculpt, design, and assemble ideas there. They begin with basic shapes and virtual blocks, nothing fancier than that.
The AOSEED X-MAKER app adds AI creation tools, which AOSEED says can turn drawings, photos, and ideas into printable designs. A rough sketch came back cleaner. I still checked it before we printed.
What the App Does With a Rough Idea
A drawing on a phone is flat. A printed toy is not. The app gave the drawing depth. It added a base that could stand. Thicker walls went in as well, so the finished toy held together.
Tracing, Shaping, and Cleaning Up Edges
One habit helped us most. I turned our cat around on screen before printing. Face on, it looked fine. From the side, the back was too thin. It would have tipped over if printed that way.
Starting Small Keeps It Fun
Our first mistake was size. My son drew a large castle. The print dragged on. He lost interest before the roof appeared. A name tag, a small animal, or a keychain makes a better start.
A small animal fit inside the X-MAKER JOY build volume. 120 by 120 by 120 millimetres is the volume. In inches, about 4.7 on each side. A small object used less filament too. So a failed first attempt cost little.
Pick a First Project That Fits the Build Plate
A flat surface called the build plate is what the printer builds on. A hard limit on size comes from that surface. A design wider than the plate will not print as drawn. Shrinking it can make small details disappear.
The Steps Parents Actually See at Home
I opened the app. My son picked a model. I checked the size and the filament. The printer connected over Wi-Fi. Printing started with one tap.
AOSEED says most families finish their first print within 15 minutes of opening the box. The printer has to be placed first. The magnetic baseplate attached. The filament loaded. The app connected. That claim covers a small preloaded model, not a large custom design.
From App to Printer Without a Computer Class
We had no desktop computer near the printer. We did not need one. The phone was the design tool. The app sent the job to the printer. That mattered for us. We had no spare computer near the printer.
The trade-off was screen size. A phone screen hid detail. A larger screen would have shown it. Joints, ears, and wheels got a zoom-in from my son before we sent the job. Before anything went to print, we checked the parts thinner than a pencil line.
When the Print Does Not Match the Drawing
Every family that prints from app designs gets a mismatch sooner or later. Our cat’s colour looked different in plastic. A round shape printed with flat sides. The finished toy also came out smaller than we expected.
One change at a time is the rule we followed. The next version could be thicker. Or larger. Or simpler. Not all three at once. Only a single change at a time revealed what had fixed the problem.
Small Fixes That Teach More Than a Perfect Print
A broken arm on a printed figure teaches a child about thickness in a way a perfect print never does. The next figure gets thicker arms. A toy that tipped over taught balance. The next toy got a wider base.
Choosing a Printer for App-Based Making
Not every home printer suited app-based design for children. Would my son manage to pick a model in the app and start a print on his own, without me touching the settings? While the printer worked, did an enclosure keep its moving parts inside?
We also checked whether the app included a ready-to-print library. A child stuck for an idea could start from a model instead of a blank screen. The X-MAKER JOY’s listed library runs to 20,000 models or more.
For families comparing options, 3D printers for kids differ mainly in build size, age range, and how much setup the app handles. Children aged 4 to 12 are the listed age range for the X-MAKER JOY. A parent nearby is part of printing for younger children. Older children customise designs on their own.
Conclusion
A phone sketch became a toy in our house when three simple things lined up. An app that accepted a rough drawing. A printer that built small objects without a long setup. A first project small enough to finish. Start small. Check thickness before printing. Change one thing after a failed print.
The toy at the end was only part of the result. The other part was my son. He had learned that a drawing can be changed. Tested. Improved. A failed print was information. Not a wasted evening.